
In december 2020 Trippus launched a new standard template for invitations.
This standard template will be automatically chosen when you create a new invitation.
If your organisation have other templates for invitations you can of course select to use any of them for your mailings.
The editing of the template is one of several steps that you have to go through to be able to send the invitation to your list of potential participants.
>Read here about all the steps
This is how you edit the Trippus standard template
Generally
- To work with the invitation in the best way possible - expand the work space by clicking the icon with four arrows.
Click the icon again to contract the works space.
- If there's some part of the invitation that you don't want or need for your invitation, right click in that particular cell or box, choose Row / Delete row
We will divide the template into three parts and describe below how to edit each part.
Part 1
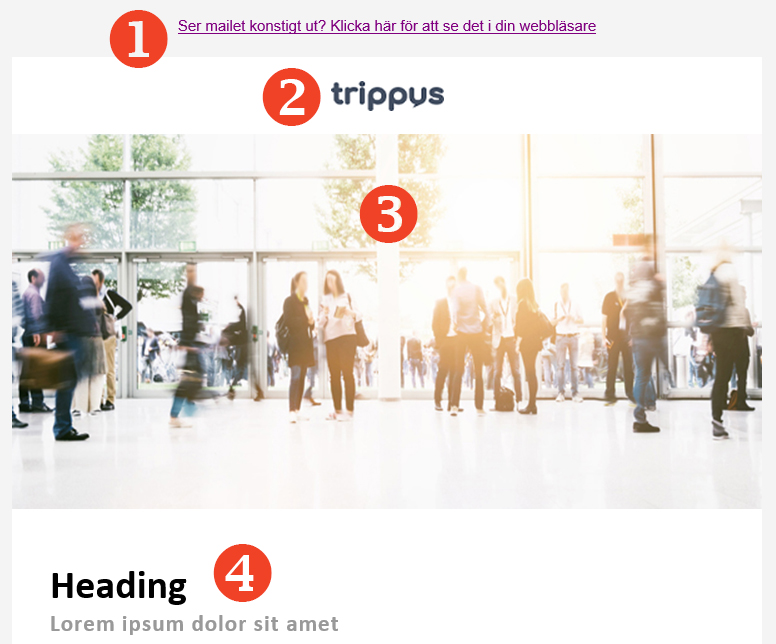
- "Ser mailet konstigt ut.."
This Swedish sentence says in English: "Does this e-mail looks strange? Click here to view it in your browser"
So to change this to your language or a completely different sentence, click somewhere in the middle of the sentence and write your own translation or sentence. Then just erase any letters or words that was left from the original sentence.
Be careful so you don't delete the link! - Logotype
Change to logotype by double clicking at the Trippus-logotype.
Upload the a new logotype in .jpg-format at the tab Upload.
You choose yourself what size the logo should have but we recommend that you upload a logo that is not so large.
The Trippus logo in the standard template is 150px wide so if you want your logo to be almost the same in size, upload a logo that is around 150px wide.
Absolute max width is 600px. - Main image
Just as the logotype you can change the larger image to one of your own choice.
The image that you want to upload must be in .jpg-format and 600px wide. Height doesn't matter.
Upload a new image by double click at the present image, klick on the tab Upload, then search for your image, click on Send to server and then OK. - Heading
This is just plain text formatted as a heading.
Just edit the text as you want.
Heading is formatted as Heading 1.
Part 2
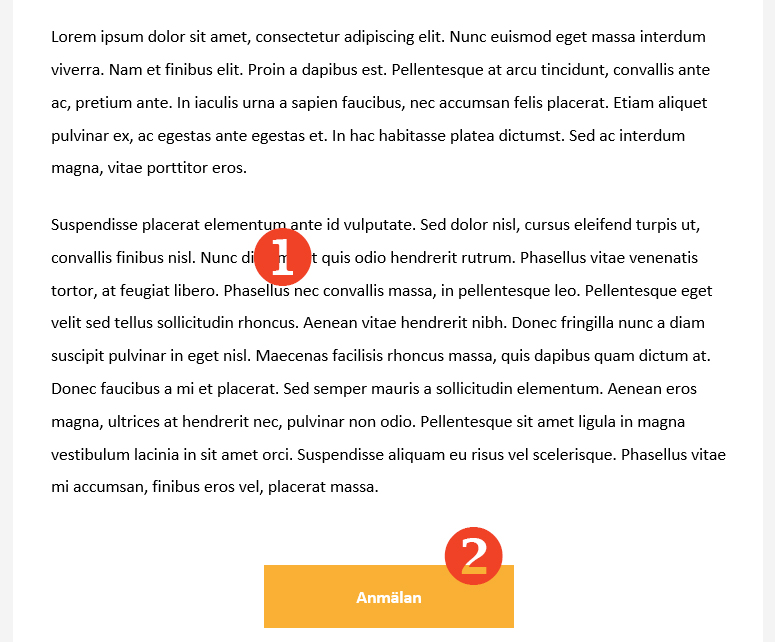
- Content text
Here is a part where you can add the content to your mailing.
The text is formatted as Normal - Button for accepting the invitation
Pre-set to redirect participants to a registration
In the Trippus standard template this button is pre-set to redirect to a registration form.
So if you want the recipients who accepts the invitation to be redirected to the registration you don't have do do anything with this button regarding the link.
When you create the mailing structure you have to choose "Registration" in the structure setup so participants who accepts the invitation will be sent to the registration.
Change to redirect to Event page
Instead of redirecting recipients who accepts the invitation, to a registration form, you can let people who accepts the invitation be automatically registered (without coming to the registration) and redirected to an eventpage.
If you want this function you have to
1. Change the dynamic link on the Accept button
2. Choose the behavior Event page when you are setting up the mailing structure
3. Build up an event page for the participant category in the mailing structure that handles and receives the recipients who accepts the invitation
This is how you change the behavior for the "accept button" to set the redirect to the event page with auto accept
1. Double click on the text "Anmälan" (in English: Registration) in the button
2. In the field URL, delete the present value
3. Enter this exact value instead:
|!SHOWMYPAGEACCEPT!|
4. Click OK
Change color on the button
- Click on the button
- Right-click in the button
- Choose Cell property
- In the field Background color, enter a hex-code for your chosen color (ex #55DD33) or pick a color by clicking at the button Choose)
Part 3
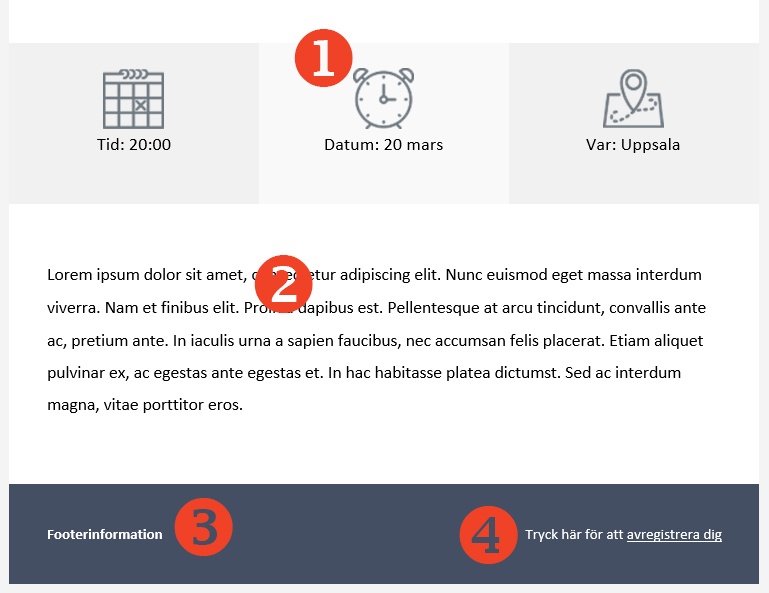
- Icons
Icons to visualize date, time and place.
-Change the text under the icons by editing the text
-If you want to remove the part with the icons, click somewhere just outside an icon, right click, choose Row and then Delete row
Own icons?
If you want to upload your own icons that's possible.
In the standard template the icons has transparent background to be able to see the background color behind the icons.
If you want your icons to have transparent background as well you have to create them on a transparent background and then save them in the format .png.
The size of the icons should be 49x49px. - Content text
Another possibility to enter content text in your invitation.
The text is formatted as Normal
If you want to remove this part, just click somewhere in the text, right click, choose Row and then Delete row - Footer information
Here you can enter for example company information or contact information.
To edit, change the word Footerinformation with the text of your choice.
Change color?
If you want to change the color of the background for footer, then just click right outside the box with the footer information, right click, choose Cell, Cell properties and in the field Background color you can either enter a hex-code for the color of your choice or just pick a suitable color with the color picker. - "Tryck här för att avregistrera dig"
This Swedish sentence means: "Click here to unregister"
In the standard template the possibility to unregister or decline an invitation is placed in the right bottom of the invitation.
To change this sentence to your own language or a completely different sentence, click somewhere in the middle of the sentence and write your own translation or sentence. Then just erase any letters or words that was left from the original sentence.
Be careful so you don't by mistake delete the link that goes to the decline function.
Comments
0 comments
Article is closed for comments.