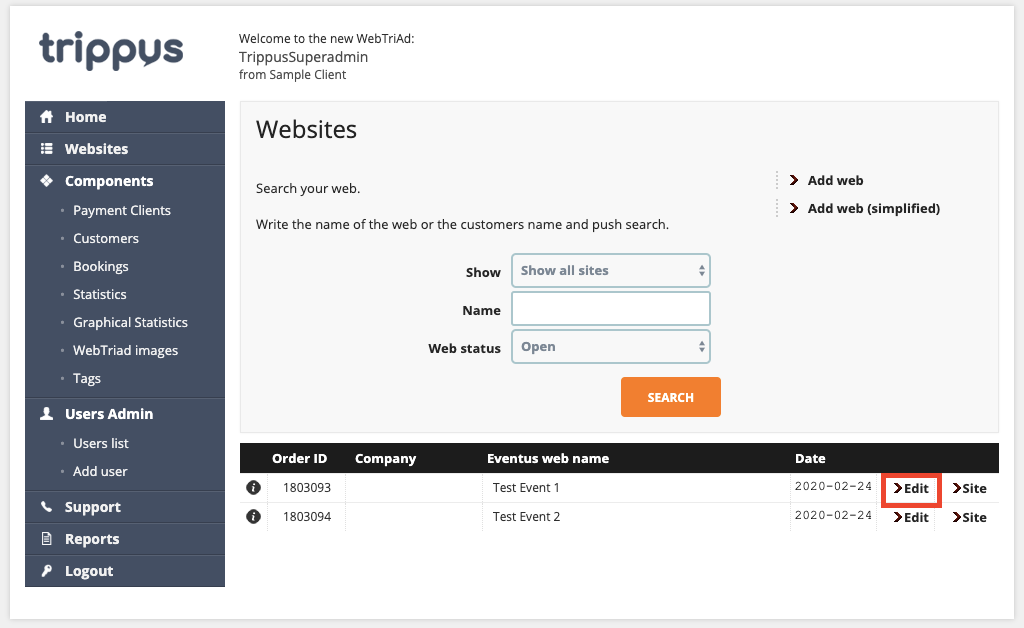
Above is the screen you see after you click "Websites" on the left sidebar. Click "Edit" to get to the settings.
Descriptions of Options
- Site
- Takes you into the main Event Admin
- Upload Logo
- Copy contents
- Enables copying of contents from an already created event
- Name of Eventus Web
- Use this to change the Event Name.
- Note: This appears in website headers, confirmation emails, etc
- Username, Password (for admin), Password (for Admin Light)
- Allows someone to log directly into your event - more info here
- Client (for external invoicing)
- Chooses your payment client (where credit card payments get processed through). If you have multiple merchant accounts, be sure to select the appropriate one before creating your event
- User
- The "Main User" this event is assigned to
- Changing this User will make this event appear on that User's "Websites" homepage under "Show My Sites"
- Web status
- These are filtering options for the Websites view
- Order date
- When your event was created
- Destination
- Main language
- Default country
- Default currency
- Default time zone
- Number of days for the invoice to be paid
- OR Invoice date
- Invoicing fee
- Number of choices in feedback questionnaire
- Standard number of questions for surveys. This can be changed in the survey tool!
- Sender email address
- The actual Email Address that Event Emails (such as confirmation emails) will come from
- More Information Here
- Sender email alias
- The name that will be displayed next to the email in the attendee's inbox
- Show logo in registration window
- Presentation template
- Remaining Fields (VAT, Company, Address, etc.)
Comments
0 comments
Article is closed for comments.