This guide contains information on what to do if your attendees aren't receiving Confirmation Emails.
-------------------------------------------------- ----
1. Confirm the Registration Processed
Just filling out the fields does not automatically create a registration. Attendees must go through the Payment page regardless if you charge money for the event or not. Clicking the Payment/Book button is what processes the booking and automatically sends the confirmation email.
1a. Check that the Registration is Confirmed
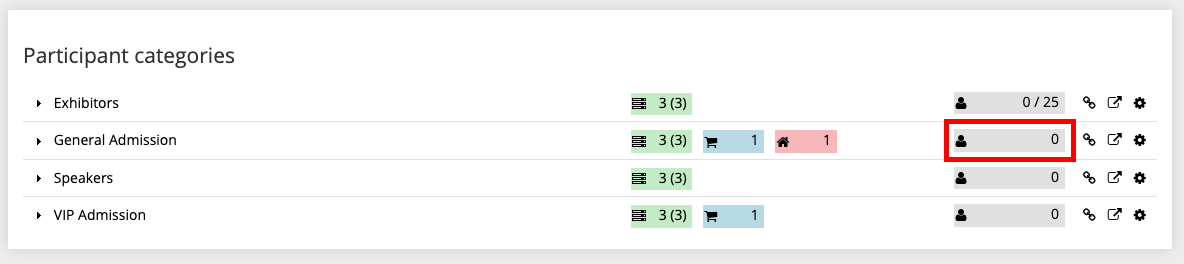
- Click Home
- Click into the Registrant List in the appropriate Participant Category (image above)
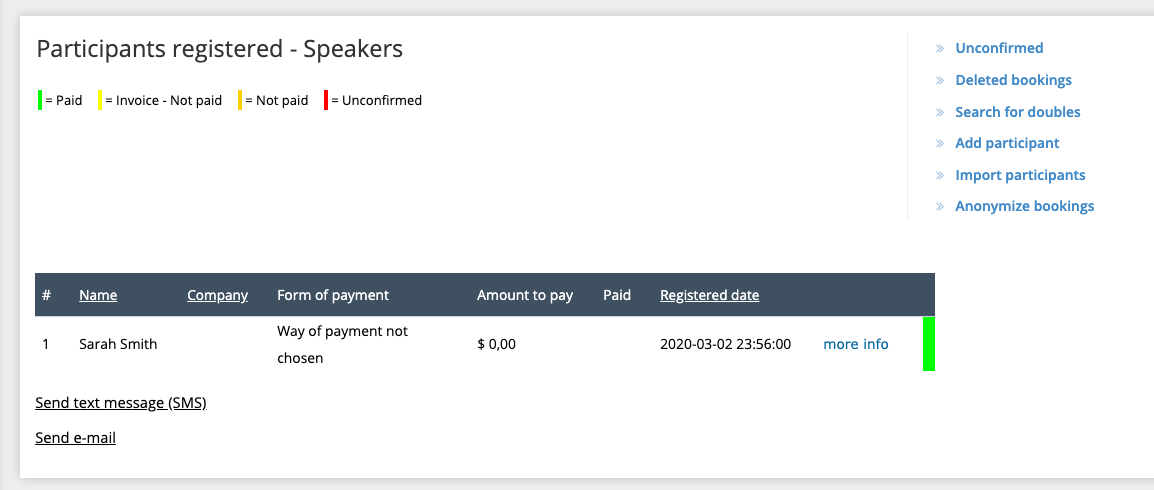
- Ensure the registrant has a Green Bar next to their name, meaning they are confirmed (image below)
Don't see the attendee's name? Or do they have a red bar instead of green? Proceed to the next step!
1b. Look for Unconfirmed Bookings
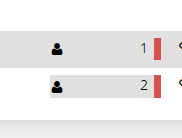
The red line next to a participant category under “Home“ denotes the presence of unconfirmed bookings.
- Click Reports
- Click Registered - NEW Lists
- Click Show Unconfirmed
- Tip! Click More Info to communicate with attendees within the system
If the attendee appears here, they did not complete their booking and must register again.
There is a setting within Settings in the left side menu that lets the system automatically delete unconfirmed bookings after a minimum of 40 minutes.
If you have a limited amount of registrants allowed we recommend using that setting, as the unconfirmed bookings takes a spot.
2. Test Confirmation Yourself
- Create a test booking with your email address to make sure you receive the confirmation email
- Tip! If you have payment enabled, create a discount code for $0 registrations
3. Check Junk/Spam
- It's possible that the confirmation emails are being flagged, and may appear in the junk/spam folders. Tell your attendees to check this folder for your email
- If the emails are found here, have them select 'mark as safe sender' to receive further emails from you
3. Change Sender Email Address/Alias
- Click the Trippus Logo in the top right corner if you are in an event OR click Websites from the main TriAd
- Search for the event you are in
- Click Edit next to the event name
- Change Sender email address and Sender email alias

4. Contact IT Department
If you change the Sender email address to your domain, and emails still aren't being received, below are instructions to give to your IT Department or Email Service Provider as your confirmation emails may be being viewed as phishing mail
- Sender server is smtprelay02.iplace.se_' with ip '_88.131.97.142
- It is recommended that you put ”a:smtprelay02.iplace.se” alternatively ”ip4:88.131.97.142” in spf record on your DNS if it is desired to use your own domain as email sender from the Trippus system.
Comments
0 comments
Article is closed for comments.